


In this article, we'll learn how to create an EC2 instance using the AWS Command Line Interface (CLI). The AWS CLI provides a powerful and flexible way to interact with AWS services, allowing you to automate tasks and manage resources from the command line. Follow along to discover how to launch an EC2 instance with just a few simple commands.
Step 1 - Install and Configure the AWS CLI
Before we begin, ensure that you have the AWS CLI installed on your local machine. You can download and install the AWS CLI from the official AWS documentation: https://docs.aws.amazon.com/cli/latest/userguide/cli-chap-install.html
Once installed, configure the AWS CLI with your AWS credentials by running the aws configure command and provide your Access Key ID, Secret Access Key, region, and output format (JSON, text, or table).
Step 2 - Create a key-pair for you to login with the below command
aws ec2 create-key-pair --key-name awsprod --query 'awsprod' --output text > awsprod.pem

Step 3 - Create a Security Group.
aws ec2 create-security-group --group-name awssecurity --description "awssecuritygroup"

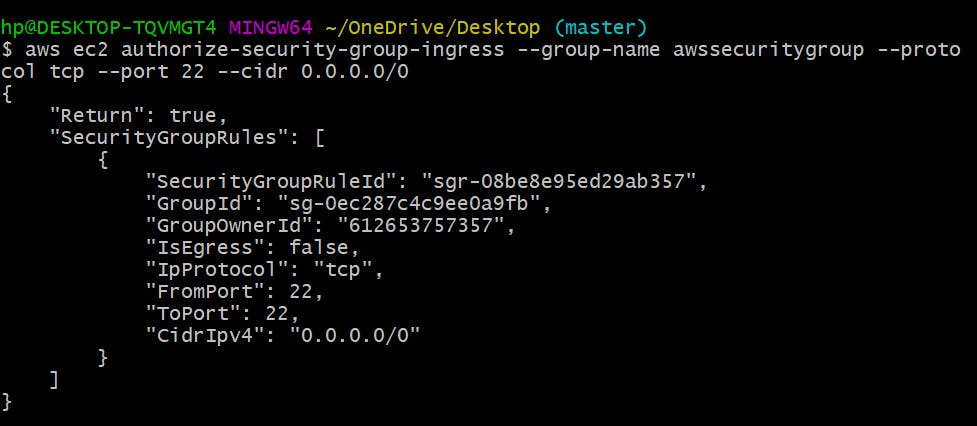
Step 4 - Authorize the Security Group
Allow the SSH traffic from everywhere or configure the inbound and outbound rules according to your requirements.
aws ec2 authorize-secuirty-group-ingress --group-name awssecuritygroup --protocol tcp --port 22 --cidr 0.0.0.0/0
Step 5 - Launch EC2 Instance
Now that the AWS CLI is set up, we can proceed to launch an EC2 instance. Use the aws ec2 run-instances command to launch an EC2 instance, specifying the instance type, AMI (Amazon Machine Image), and other configuration options as needed.
$ aws ec2 run-instances --image-id ami-007020fd9c84e18c7 --count 1 --instance-type t2.micro --key-name awsprod --security-groups awssecuritygroup
Once the instance is launched, you can use the AWS CLI or other tools to manage it further. For example, you can describe the instance details, stop or terminate the instance, attach additional volumes, and more.
Here are a few useful commands to manage EC2 instances:
aws ec2 describe-instances: View details of your EC2 instances.aws ec2 stop-instances: Stop a running EC2 instance.aws ec2 terminate-instances: Terminate an EC2 instance.aws ec2 create-tags: Add tags to your EC2 instances for better organization.
Conclusion
Using the AWS CLI, you can effortlessly create and manage EC2 instances directly from the command line, enhancing efficiency and facilitating automation in your AWS workflow. By exploring various options and commands, you can unlock the full potential of the AWS CLI for EC2 management, enabling you to tailor your instances to your specific requirements and optimize your cloud infrastructure for performance, scalability, and cost-effectiveness. Whether you're provisioning new instances, modifying configurations, or performing routine maintenance tasks, the AWS CLI provides a flexible and powerful toolset to streamline your operations.
Hope you found this article helpful. See you around!!!